

What you’ll need
- Green chunky/bulky yarn
- Red chunky/bulky yarn
- White yarn
- Light green yarn
- Yellow/gold yarn
- Brown yarn
- Crochet hook appropriate for your yarn (about 4–5 mm is a good starting point)
- Stuffing
- Tapestry needle
- Scissors
- Small red/white beads or yarn for decorations
- Optional: thin cardboard or craft wire for the wreath’s inner support
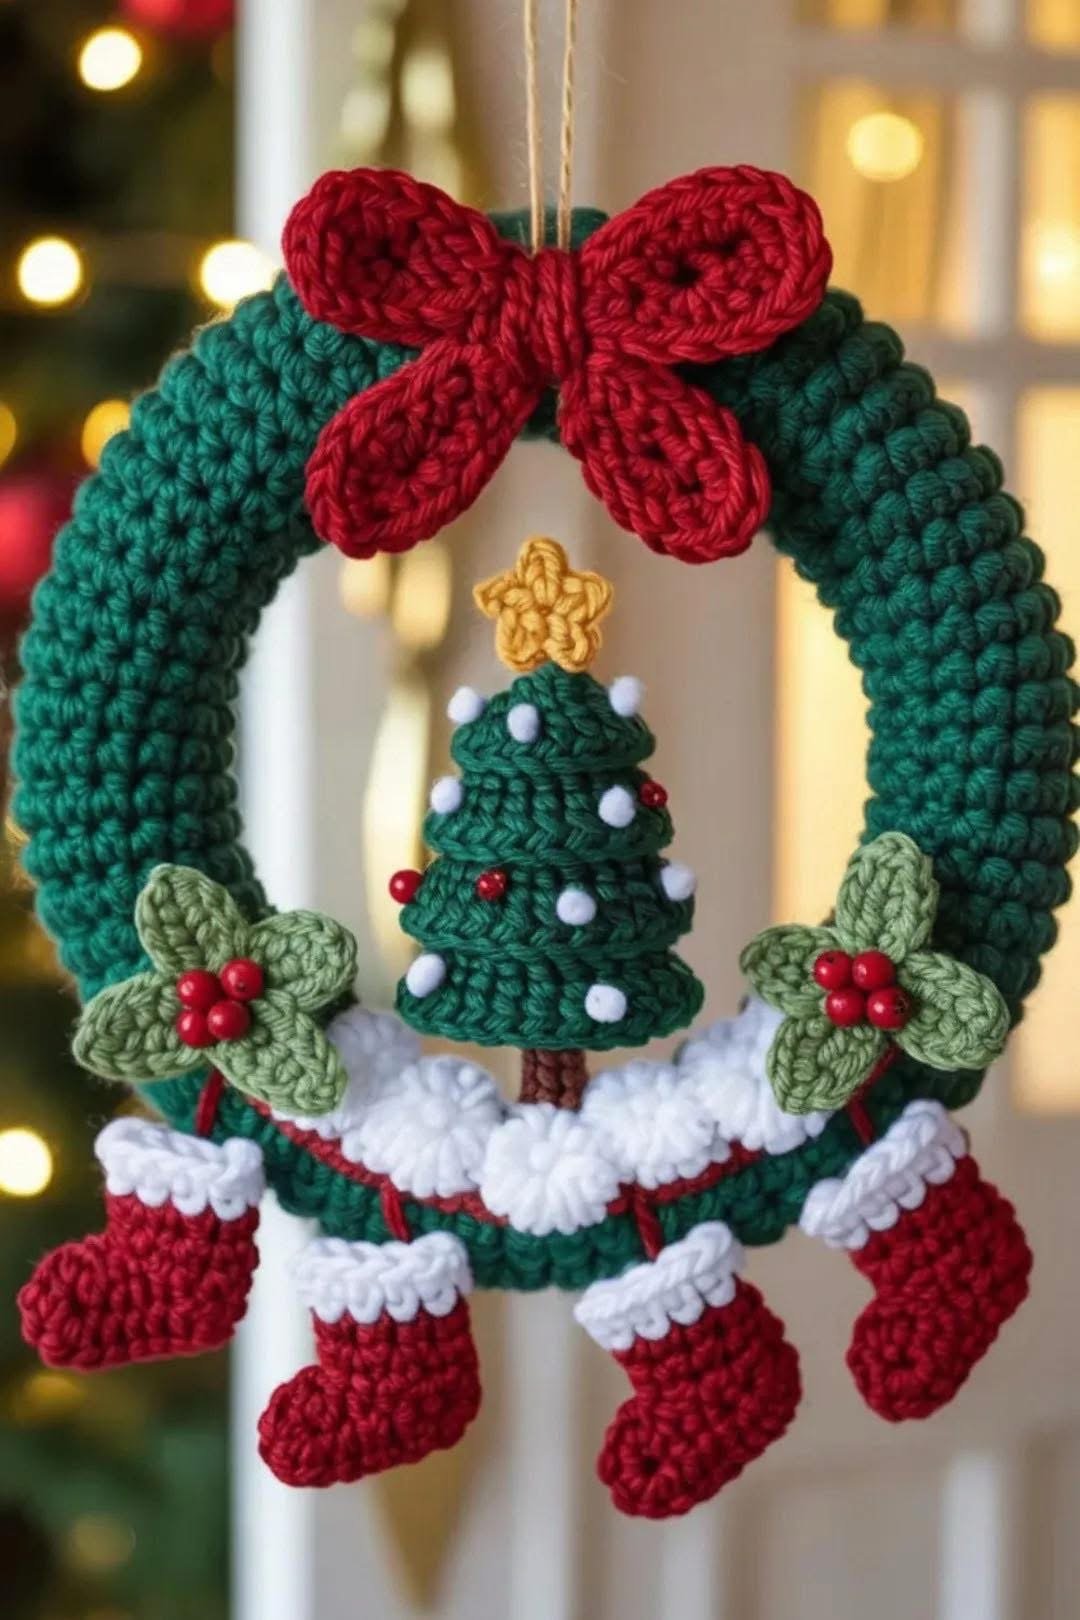
1. Make the green wreath
The easiest method is to crochet a thick tube/ring:
- Chain enough stitches to make a circle roughly 25–30 cm (10–12 in) around.
- Join the ends.
- Crochet rounds of single crochet (SC)around the chain.
- Continue until the wreath is about 5–7 cm (2–3 in) thick.
- Stuff it lightly as you crochet the final rounds.
- Close the opening.
Alternatively, wrap/cover a foam or cardboard ring with crocheted green fabric—this gives a much sturdier wreath.
2. Add the white snow
Using white yarn, crochet several little fluffy scallops and sew them across the bottom of the wreath.
For a simple snow puff:
In one stitch:
5 double crochet (DC)
slip stitch into the next stitch
Repeat to create a fluffy snowy edge.
3. Make the Christmas tree
Make a small stuffed cone/tree:
Bottom: crochet a green circle, increasing each round.
Then:
- Continue upward while gradually decreasing.
- Add horizontal ridges by crocheting in the back loops.
- Stuff lightly before closing.
- Add white pom-poms for snow.
- Sew on tiny red beads as ornaments.
- Make a tiny yellow 5-point star and sew it to the top.
- Add a small brown trunk.
You can make the tree approximately 10–12 cm (4–5 in) tall.
4. Make the stockings
For each stocking:
- Crochet a small red rectangle in SC.
- Fold it in half and sew the sides together.
- Shape the toe by decreasing stitches at one end.
- Add a few rounds of white yarn around the opening.
- Bend the top slightly outward.
- Sew a small loop of yarn to the back for attachment.
Make 4 stockings and attach them along the bottom of the wreath.
5. Make the holly leaves
For each leaf, chain about 8–10 stitches.
Crochet around both sides of the chain, using increases toward the middle to create a leaf shape. Add little decreases/points around the edges if you want the serrated holly look.
Make 4–6 leaves, then sew them into pairs on either side of the tree.
Add three small red berries to each cluster.
6. Make the big bow
The bow is actually one of the most noticeable parts.
Make four elongated red crochet petals/loops:
- Crochet an oval-shaped piece.
- Make 4 of them.
- Pinch each piece in the center.
- Sew them together at their centers.
- Wrap red yarn tightly around the middle to form the knot.
Attach the bow to the top of the wreath.
7. Assemble everything
Arrange the pieces like this:
🎀
___/ \___
/ \
/ \
| 🎄 |
| |
\ 🍃 🍃 /
\_______________/
🧦 🧦 🧦 🧦
Sew the tree securely to the wreath first, then the holly, snow, and stockings. Finally, attach a long loop of yarn at the top so you can hang it.