

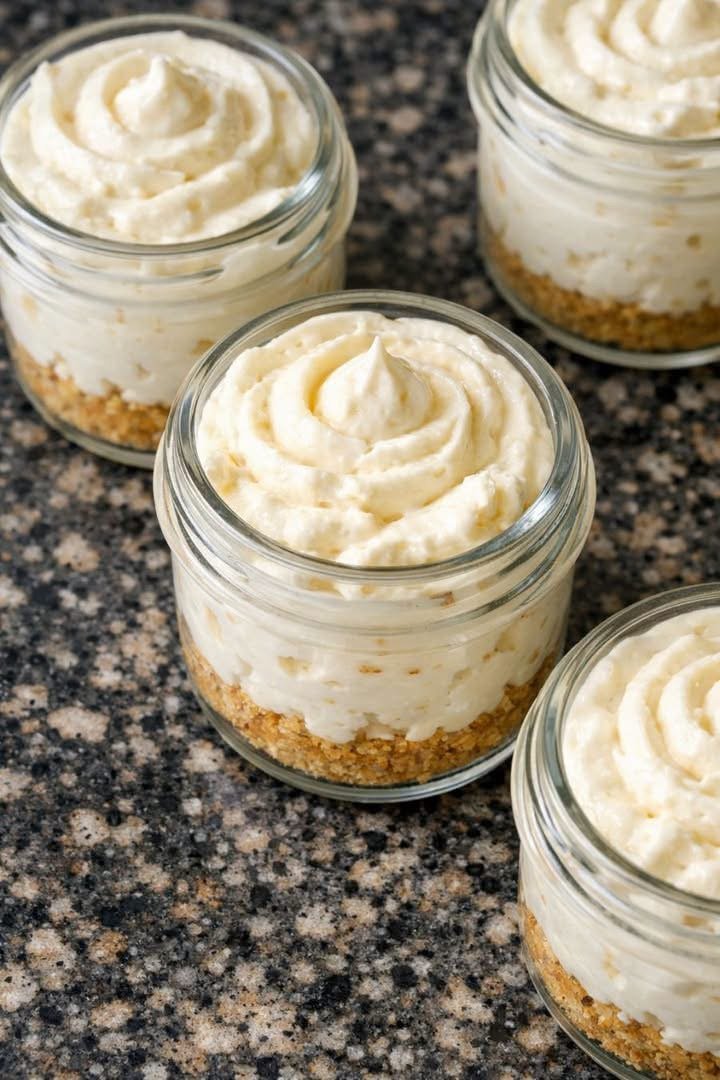
No-Bake Cheesecake Cups
These No-Bake Cheesecake Cups are an easy individual dessert that delivers all the creamy, tangy flavor of classic cheesecake without turning on the oven. Each little cup features a buttery graham cracker crust topped with a rich, smooth cheesecake filling and your favorite topping.
They are perfect for parties, holidays, potlucks, family dinners, or whenever you want a simple dessert that looks special without requiring much effort.
Why You’ll Love These No-Bake Cheesecake Cups
- No oven required
- Easy individual servings
- Creamy cheesecake filling
- Simple ingredients
- Quick to prepare
- Perfect for parties and gatherings
- Easy to customize
- Great make-ahead dessert
Ingredients
For the Crust
Graham Crackers:
Crushed graham crackers create a simple, buttery crust.
Butter:
Melted butter helps bind the crumbs together and gives the crust its rich flavor.
For the Cheesecake Filling
Cream Cheese:
Use softened full-fat cream cheese for the richest and smoothest filling.
Powdered Sugar:
Powdered sugar sweetens the filling while dissolving easily.
Vanilla Extract:
A little vanilla enhances the classic cheesecake flavor.
Heavy Whipping Cream:
Whipped cream gives the filling its light, fluffy texture.
For the Topping
Top each cheesecake cup with your favorite fruit, pie filling, chocolate shavings, caramel sauce, or simply a little whipped cream.
How to Make No-Bake Cheesecake Cups
Step 1: Prepare the Crust
Crush the graham crackers into fine crumbs.
Combine the crumbs with melted butter until evenly moistened.
Spoon the mixture into small dessert cups or jars. Press gently into an even layer.
Place the cups in the refrigerator while you prepare the filling.
Step 2: Make the Cheesecake Filling
Place softened cream cheese in a large mixing bowl.
Beat until smooth and creamy.
Add powdered sugar and vanilla extract. Beat again until completely combined.
Step 3: Whip the Cream
In a separate bowl, beat the heavy whipping cream until stiff peaks form.
Be careful not to overbeat it.
Step 4: Combine the Filling
Gently fold the whipped cream into the cream cheese mixture.
Fold until the mixture is smooth, creamy, and fluffy.
Step 5: Fill the Cups
Spoon or pipe the cheesecake filling over the chilled graham cracker crusts.
Smooth the tops with the back of a spoon or use a piping bag for a prettier presentation.
Step 6: Chill
Cover the cheesecake cups and refrigerate for at least 2 hours.
For the best texture, chilling for several hours or overnight works especially well.
Step 7: Add Toppings
Add your favorite topping just before serving.
Fresh berries, cherry pie filling, strawberries, blueberries, or chocolate are all delicious choices.
Tips for the Best No-Bake Cheesecake Cups
Use softened cream cheese.
Room-temperature cream cheese blends much more smoothly and helps prevent lumps.
Don’t skip the chilling time.
The filling needs time to firm up and develop the proper cheesecake texture.
Whip the cream properly.
Stiff peaks give the filling enough structure to hold its shape.
Don’t overmix after adding the whipped cream.
Gentle folding helps maintain the light texture.
Use clear cups for parties.
Small clear dessert cups beautifully show the layers of crust and cheesecake filling.
No-Bake Cheesecake Cup Topping Ideas
One of the best things about this dessert is how easy it is to customize.
Try:
- Strawberry topping
- Cherry pie filling
- Blueberry sauce
- Fresh raspberries
- Fresh strawberries
- Lemon curd
- Chocolate ganache
- Caramel sauce
- Crushed cookies
- Chopped nuts
- Shaved chocolate
You can even make several different flavors from one batch.
Can I Make These Ahead of Time?
Yes. These cheesecake cups are ideal for making ahead.
Prepare them up to 24 hours before serving and keep them covered in the refrigerator.
Add delicate toppings, such as fresh berries, shortly before serving for the best appearance.
How to Store No-Bake Cheesecake Cups
Keep the cheesecake cups refrigerated and covered.
They are best enjoyed within 3 to 4 days.
Because the crust can soften over time, they are at their best during the first couple of days.
Can I Freeze Cheesecake Cups?
Yes, although the texture may change slightly after thawing.
For best results, freeze the cheesecake cups without fresh fruit toppings. Cover them tightly and freeze for up to 1 month.
Thaw overnight in the refrigerator before serving.
Frequently Asked Questions
Can I use store-bought graham cracker crumbs?
Yes. Store-bought crumbs work perfectly and save time.
Can I use whipped topping instead of heavy cream?
Yes. Thawed whipped topping can be folded into the cream cheese mixture for an even quicker version.
Can I make these without a crust?
Absolutely. Simply spoon the cheesecake filling into small cups and add fruit or another topping.
What size cups should I use?
Small 4- to 6-ounce dessert cups are ideal for individual servings.
Why is my cheesecake filling too soft?
Make sure the cream cheese was properly softened but not warm, and that the whipping cream was beaten to stiff peaks. Adequate refrigeration is also important.
No-Bake Cheesecake Cups Recipe Card
Prep Time: 20 minutes
Chill Time: 2 hours
Total Time: 2 hours 20 minutes
Servings: 8–10 cups
Ingredients
Crust
- 1 1/2 cups graham cracker crumbs
- 5 tablespoons butter, melted
Cheesecake Filling
- 16 ounces cream cheese, softened
- 3/4 cup powdered sugar
- 1 teaspoon vanilla extract
- 1 cup heavy whipping cream
Topping
- Your favorite fruit, pie filling, chocolate, caramel, or whipped cream
Instructions
- Combine graham cracker crumbs and melted butter.
- Divide the crumb mixture among 8 to 10 small dessert cups.
- Press gently into the bottom of each cup.
- Refrigerate while preparing the filling.
- Beat softened cream cheese until smooth.
- Add powdered sugar and vanilla and beat until creamy.
- In a separate bowl, whip the heavy cream until stiff peaks form.
- Gently fold the whipped cream into the cream cheese mixture.
- Spoon or pipe the cheesecake filling over the crust.
- Cover and refrigerate for at least 2 hours.
- Add your favorite toppings just before serving.
- Serve chilled.
Final Thoughts
No-Bake Cheesecake Cups are the perfect dessert when you want something creamy, delicious, and easy without turning on the oven. The buttery graham cracker crust and fluffy cheesecake filling create a classic combination, while the toppings can be changed to suit any occasion.
Make them with cherries for the holidays, fresh berries for summer, or chocolate and caramel for an extra-indulgent treat. Because each serving is prepared individually, these little cheesecake cups are as convenient to serve as they are delicious to eat.