

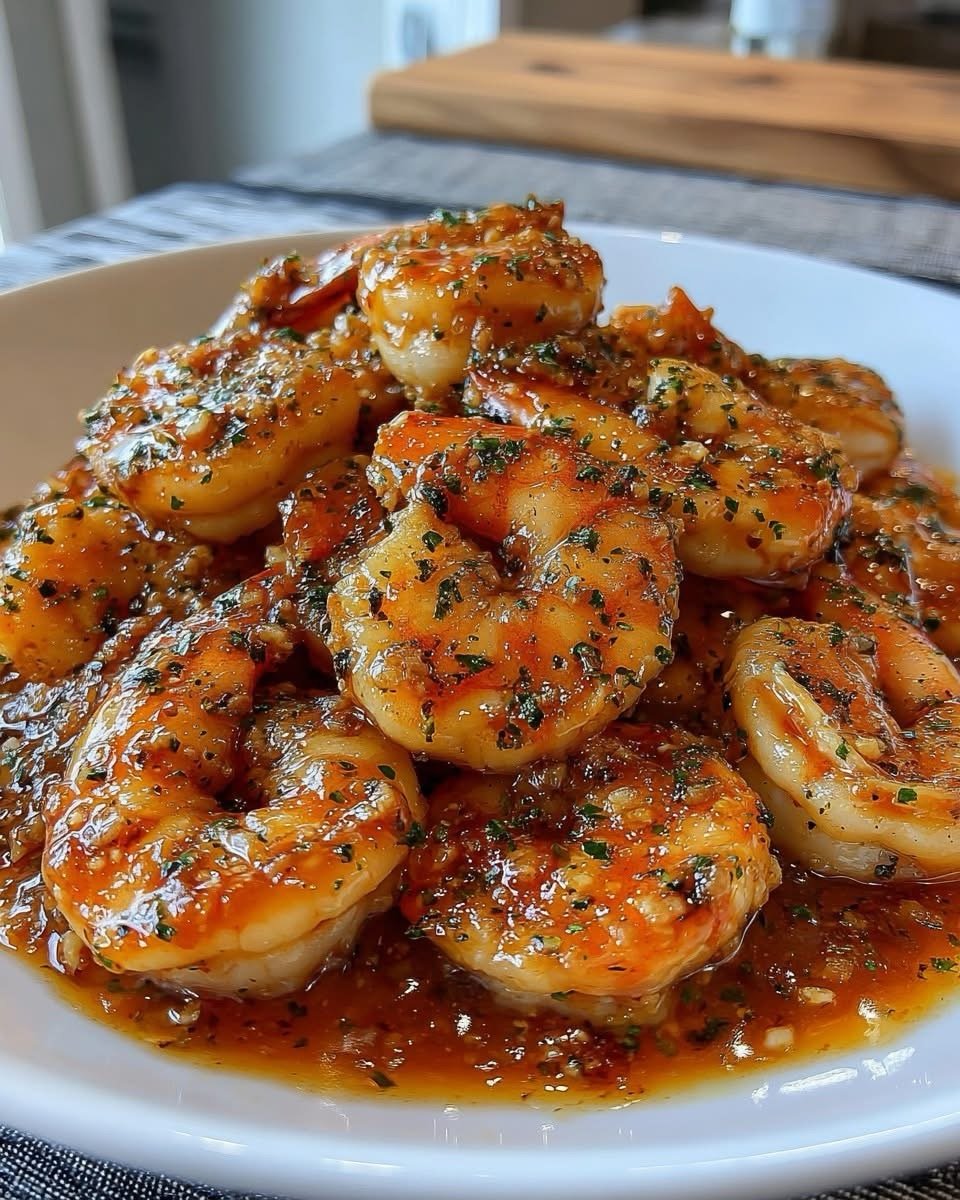
There are quick dinners, and then there are dinners that taste like they came from a restaurant but take less time than ordering takeout. This honey garlic butter shrimp falls into the second category. Plump, juicy shrimp are seared in a hot skillet, then tossed in a luscious sauce made with butter, honey, garlic, and a touch of lemon. The sauce is sweet, savory, and garlicky, clinging to every shrimp like a warm blanket. Serve it over rice, pasta, or with crusty bread to soak up every last drop.
This honey garlic butter shrimp is the answer to “what’s for dinner?” on busy nights. It comes together in about 10 minutes, uses a handful of pantry ingredients, and is impressive enough for date night. The key is high heat and not overcooking the shrimp—they need just a minute or two per side. The sauce comes together in the same pan, capturing all the browned bits and infusing the shrimp with incredible flavor. One bite, and you will never go back to frozen shrimp scampi.
Why You Will Love This Recipe
· Ready in 10 Minutes: Faster than takeout.
· One Skillet, Minimal Cleanup.
· Sweet, Savory, Garlicky Sauce.
· Plump, Juicy Shrimp Every Time.
· Uses Pantry-Friendly Ingredients.
· Great for Weeknights or Entertaining.
· Low-Carb and Keto-Friendly.
· Kid-Approved.
Ingredients List
For the Shrimp:
· 1 ½ lbs large or jumbo shrimp (16-20 count), peeled and deveined (tails on or off)
· ½ teaspoon kosher salt
· ¼ teaspoon black pepper
· ½ teaspoon paprika (optional)
· 2 tablespoons olive oil
For the Honey Garlic Butter Sauce:
· 4 tablespoons unsalted butter
· 6 cloves garlic, minced (about 2 tablespoons)
· ¼ cup honey
· 2 tablespoons low-sodium soy sauce (or tamari for gluten-free)
· 1 tablespoon fresh lemon juice
· ¼ teaspoon red pepper flakes (optional, for heat)
For Garnish:
· 2 tablespoons fresh parsley, chopped
· Lemon wedges
Step-by-Step Instructions
Step 1: Prepare the Shrimp
Pat the shrimp completely dry with paper towels. In a small bowl, toss the shrimp with salt, pepper, and paprika (if using).
Step 2: Sear the Shrimp
Heat the olive oil in a large skillet over medium-high heat. When the oil is shimmering, add the shrimp in a single layer (work in batches if needed). Cook for 1-2 minutes per side, until the shrimp are pink, curled, and opaque. Do not overcook. Remove the shrimp from the skillet and set aside on a plate.
Step 3: Make the Honey Garlic Butter Sauce
Reduce the heat to medium. Add the butter to the same skillet. Once melted, add the minced garlic and cook for 30-60 seconds until fragrant, but not browned. Stir in the honey, soy sauce, lemon juice, and red pepper flakes (if using). Bring to a gentle simmer and cook for 1-2 minutes until the sauce thickens slightly.
Step 4: Combine and Coat
Return the cooked shrimp to the skillet. Toss to coat in the honey garlic butter sauce. Cook for 30 seconds more, just until the shrimp are heated through.
Step 5: Garnish and Serve
Sprinkle with fresh parsley. Serve immediately with lemon wedges.
Cooking Tips and Pro Tips for Best Results
· Pat shrimp completely dry: Removing surface moisture ensures a good sear. Use paper towels before seasoning.
· Do not overcook the shrimp: Shrimp cook very quickly—1-2 minutes per side is usually enough. They are done when they turn pink and curl into a loose C shape. Overcooked shrimp become rubbery.
· Use large or jumbo shrimp: Smaller shrimp cook even faster and are easier to overcook. Look for 16-20 or 21-25 count per pound.
· Work in batches if needed: Overcrowding the pan lowers the temperature and causes the shrimp to steam instead of sear.
· Use fresh garlic, not powdered: Fresh minced garlic is essential for the bold, aromatic flavor. Garlic powder will not give the same result.
· Do not let the garlic burn: Burnt garlic becomes bitter. Cook it for just 30-60 seconds until fragrant, then add the remaining sauce ingredients.
Variations and Substitutions
Spicy Honey Garlic Shrimp:
Add 1 teaspoon of sriracha or chili garlic sauce to the sauce. Double the red pepper flakes. Garnish with sliced green onions.
Lemon Honey Garlic Shrimp:
Add the zest of 1 lemon to the sauce. Increase the lemon juice to 2 tablespoons. Garnish with extra lemon zest.
Ginger Honey Garlic Shrimp:
Add 1 tablespoon of freshly grated ginger along with the garlic. The ginger adds a warm, aromatic note.
Honey Garlic Shrimp with Vegetables:
Add 1 cup of snap peas, broccoli florets, or bell pepper strips to the skillet after removing the shrimp. Stir-fry for 2 minutes, then add the sauce and shrimp.
Creamy Honey Garlic Shrimp:
After making the sauce, stir in ¼ cup of heavy cream or coconut milk. Simmer for 1 minute until creamy.
Air Fryer Honey Garlic Shrimp:
Cook the shrimp in an air fryer at 400°F for 5-7 minutes, shaking halfway through. Make the sauce on the stovetop and toss to combine.
Serving Suggestions
This honey garlic butter shrimp is incredibly versatile. Serve it:
· Over Rice: White rice, brown rice, or cauliflower rice.
· Over Pasta: Toss with fettuccine, linguine, or angel hair.
· With Crusty Bread: Essential for sopping up every drop of sauce.
· With Roasted Vegetables: Asparagus, broccoli, or zucchini.
· On a Salad: Over mixed greens with avocado and cucumber.
Pair with:
· Steamed jasmine rice or coconut rice
· Garlic noodles or zucchini noodles
· A simple cucumber salad
· A glass of white wine (Pinot Grigio or Sauvignon Blanc)
Storage and Reheating Instructions
Refrigerator:
Store leftovers in an airtight container for up to 2 days. Shrimp does not keep as long as meat or poultry. The sauce may separate slightly.
Freezer:
Freezing is not recommended for this dish. The texture of the shrimp becomes rubbery upon thawing.
Reheating:
· Stovetop (Best): Reheat gently in a skillet over medium-low heat for 2-3 minutes, adding a splash of broth or water to loosen the sauce.
· Microwave: Heat individual portions for 30-45 seconds at 50% power.
Nutritional Information (Approximate, per serving – serves 4)
· Calories: 390
· Protein: 28g
· Fat: 22g
· Saturated Fat: 10g
· Carbohydrates: 22g
· Fiber: 0g
· Sugar: 18g
· Sodium: 1080mg
· Iron: 10% DV
Frequently Asked Questions (FAQ)
1. Can I use frozen shrimp?
Yes. Thaw frozen shrimp completely in the refrigerator overnight or under cold running water. Pat them very dry before cooking. Do not cook from frozen; they will release too much water and steam instead of sear.
2. Can I use pre-cooked shrimp?
Not recommended. Pre-cooked shrimp will become rubbery when reheated. This recipe is designed for raw shrimp.
3. How do I prevent the shrimp from being rubbery?
Do not overcook them. Shrimp cook in 1-2 minutes per side. Remove them from the skillet as soon as they turn pink and curl into a C shape. Overcooked shrimp curl into a tight O and become tough.
4. Can I make this recipe dairy-free?
Yes. Substitute the butter with vegan butter or olive oil. Use coconut aminos instead of soy sauce. The sauce will be slightly less rich but still delicious.
5. Can I double the recipe?
Yes. Use a larger skillet or cook the shrimp in batches. Do not overcrowd the pan. Double the sauce ingredients.
6. What is the best shrimp size for this recipe?
Large or jumbo shrimp (16-20 or 21-25 count per pound) are ideal. They are meaty and hold up well to the sauce. Avoid tiny salad shrimp, which will overcook instantly.