

Introduction
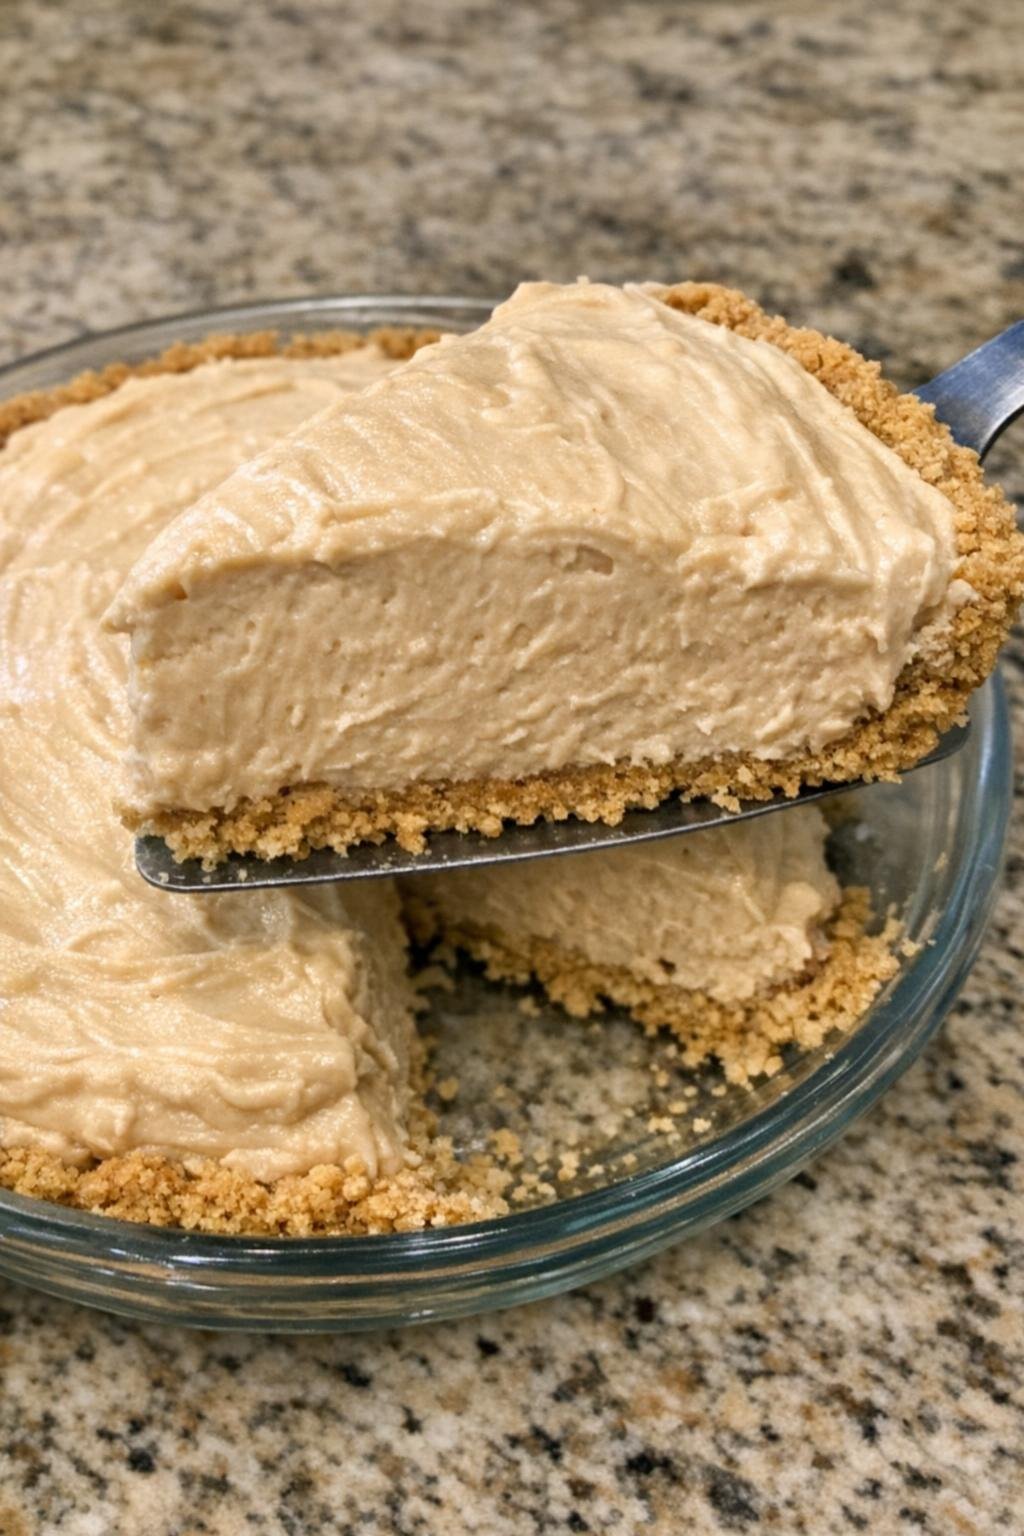
No-Bake Peanut Butter Pie is a creamy, rich, and irresistible dessert that comes together without turning on the oven. With a buttery graham cracker crust and a fluffy peanut butter cream cheese filling, every slice delivers the perfect combination of sweet, salty, and smooth flavors.
This easy dessert is perfect for holidays, potlucks, birthdays, family dinners, or anytime you want something delicious without spending hours in the kitchen. Simply prepare the crust, whip up the filling, chill, and enjoy!
Why You’ll Love This Recipe
- No baking required: Perfect for warm days or busy afternoons.
- Creamy peanut butter filling: Smooth, fluffy, and full of peanut butter flavor.
- Simple ingredients: Uses easy-to-find grocery store staples.
- Make-ahead friendly: Prepare it the day before serving.
- Perfect for sharing: One pie provides plenty of generous slices.
Ingredients
For the Crust
- 1 1/2 cups graham cracker crumbs
- 6 tablespoons unsalted butter, melted
- 2 tablespoons granulated sugar
For the Peanut Butter Filling
- 1 cup creamy peanut butter
- 8 ounces cream cheese, softened
- 1 cup powdered sugar
- 1 teaspoon vanilla extract
- 1 1/2 cups whipped topping, thawed
Optional Topping
- Additional whipped topping
- 2 tablespoons chopped peanuts
- Chocolate syrup for drizzling
Instructions
Step 1: Prepare the Graham Cracker Crust
In a medium bowl, combine the graham cracker crumbs, melted butter, and granulated sugar.
Stir until the crumbs are evenly moistened and resemble damp sand.
Press the mixture firmly into the bottom and sides of a 9-inch pie plate. Use the bottom of a measuring cup to create an even crust.
Place the crust in the refrigerator for at least 20–30 minutes to firm up.
Step 2: Beat the Cream Cheese
In a large mixing bowl, beat the softened cream cheese with an electric mixer until completely smooth and creamy.
Scrape down the sides of the bowl as needed to remove any lumps.
Step 3: Add the Peanut Butter
Add the creamy peanut butter and vanilla extract to the cream cheese.
Beat until the mixture is smooth, thick, and evenly combined.
Step 4: Sweeten the Filling
Gradually add the powdered sugar, mixing on low speed until incorporated.
Increase the mixer speed briefly until the filling becomes fluffy and creamy.
Step 5: Fold in the Whipped Topping
Add the thawed whipped topping to the peanut butter mixture.
Gently fold with a spatula until the filling is light and evenly blended. Avoid overmixing so the filling stays fluffy.
Step 6: Fill the Pie Crust
Remove the chilled crust from the refrigerator.
Spoon the peanut butter filling into the crust and spread it evenly, creating a smooth surface.
Step 7: Chill Until Firm
Cover the pie loosely with plastic wrap and refrigerate for at least 4 hours, preferably overnight.
The filling should be firm enough to slice neatly.
Step 8: Decorate and Serve
Before serving, add whipped topping, chopped peanuts, or a drizzle of chocolate syrup if desired.
Slice with a sharp knife, wiping the blade between cuts for clean slices.
Tips for the Best No-Bake Peanut Butter Pie
- Use creamy peanut butter: Conventional creamy peanut butter gives the filling a smooth and stable texture.
- Soften the cream cheese: Room-temperature cream cheese blends more easily.
- Measure powdered sugar carefully: Too much can make the filling overly sweet and dense.
- Fold gently: This keeps the whipped topping light and airy.
- Chill long enough: Four hours is the minimum, but overnight chilling gives the best results.
- Use a warm knife: Briefly dip the knife in warm water and wipe it dry before slicing.
Optional Variations
- Chocolate peanut butter pie: Add a layer of melted chocolate over the crust before adding the filling.
- Oreo crust: Replace the graham cracker crumbs with finely crushed chocolate sandwich cookies.
- Chocolate topping: Spread melted chocolate over the chilled pie.
- Crunchy peanut butter: Use crunchy peanut butter for extra texture.
- Salted peanut topping: Sprinkle chopped salted peanuts over the finished pie.
- Mini peanut butter pies: Divide the crust and filling among individual dessert cups.
What to Serve with Peanut Butter Pie
This rich dessert pairs wonderfully with:
- Fresh strawberries
- Sliced bananas
- Vanilla ice cream
- Hot coffee
- Cold milk
- Chocolate-covered peanuts
- Fresh raspberries
For a beautiful dessert presentation, serve each slice with a little whipped topping and a light chocolate drizzle.
Make-Ahead Instructions
No-Bake Peanut Butter Pie is an excellent make-ahead dessert.
Prepare the entire pie one day before serving. Cover it tightly and refrigerate overnight. Add decorative toppings just before serving for the freshest appearance.
Storage Instructions
- Refrigerator: Store covered for up to 4 days.
- Freezer: Freeze the pie, tightly wrapped, for up to 2 months.
- Thawing: For a creamy texture, thaw frozen pie overnight in the refrigerator. You can also serve it partially frozen for a firmer, ice-cream-like consistency.
Do not leave the pie at room temperature for more than 2 hours because the filling contains dairy.
Frequently Asked Questions
Can I use natural peanut butter?
Conventional creamy peanut butter is recommended because natural varieties can separate and make the filling softer or less consistent.
Do I need to bake the graham cracker crust?
No. The butter helps bind the crumbs together, and refrigeration firms the crust. Press it firmly into the pie plate and chill before filling.
Can I use homemade whipped cream instead of whipped topping?
Yes. Use approximately 1 1/2 cups of whipped cream made from heavy cream whipped to stiff peaks. The pie may be slightly less stable, so keep it well chilled.
Why is my peanut butter pie filling too soft?
The cream cheese may not have been properly softened and blended, the whipped topping may have been overmixed, or the pie may not have chilled long enough. Refrigerate for additional time before slicing.
Can I make this pie without cream cheese?
Cream cheese gives the filling structure and its signature tangy flavor. You can experiment with a different filling, but the texture and taste will be different.
Can I freeze No-Bake Peanut Butter Pie?
Absolutely. Wrap it securely and freeze it for up to 2 months. Thaw in the refrigerator before serving or enjoy it partially frozen.
Conclusion
No-Bake Peanut Butter Pie is the kind of homemade dessert that makes everyone ask for another slice. Its buttery graham cracker crust, fluffy peanut butter filling, and optional chocolate topping create a delicious combination that is hard to resist.
With simple ingredients, easy preparation, and no oven required, this creamy pie is perfect for family gatherings, holiday celebrations, and everyday dessert cravings.
Make it ahead, let it chill, and enjoy a classic peanut butter dessert that is always a crowd-pleaser.
Recipe Card
Recipe Name: No-Bake Peanut Butter Pie
Prep Time: 20 minutes
Chill Time: 4 hours
Total Time: 4 hours 20 minutes
Servings: 8
Ingredients
Crust
- 1 1/2 cups graham cracker crumbs
- 6 tablespoons unsalted butter, melted
- 2 tablespoons granulated sugar
Filling
- 1 cup creamy peanut butter
- 8 ounces cream cheese, softened
- 1 cup powdered sugar
- 1 teaspoon vanilla extract
- 1 1/2 cups whipped topping, thawed
Optional Toppings
- Additional whipped topping
- 2 tablespoons chopped peanuts
- Chocolate syrup
Instructions
- Combine graham cracker crumbs, melted butter, and sugar.
- Press firmly into the bottom and sides of a 9-inch pie plate.
- Refrigerate the crust for 20–30 minutes.
- Beat softened cream cheese until smooth.
- Add peanut butter and vanilla extract; mix until creamy.
- Gradually beat in powdered sugar.
- Gently fold in whipped topping.
- Spread filling evenly into the chilled crust.
- Cover and refrigerate for at least 4 hours or overnight.
- Add optional toppings, slice, and serve chilled.
Storage: Refrigerate covered for up to 4 days or freeze for up to 2 months.