

Introduction
If you love old-fashioned desserts that are easy to prepare and packed with delicious flavor, these 4-Ingredient Hello Dolly Bars are a recipe worth keeping. Also known as magic cookie bars or seven-layer bars in their traditional versions, Hello Dolly Bars are famous for their buttery graham cracker crust, sweet coconut, rich chocolate, and gooey condensed milk.
This simplified four-ingredient version delivers all the comforting flavors you love without a long ingredient list or complicated preparation. It is perfect for holiday cookie trays, bake sales, potlucks, family gatherings, or an easy weekend treat.
The secret is letting the ingredients do the work. Sweetened condensed milk binds everything together as the bars bake, creating a chewy, golden dessert with crisp edges and a soft, fudgy center.
Why You’ll Love These Hello Dolly Bars
- Only four ingredients: A short shopping list makes this recipe easy and affordable.
- Quick preparation: The crust and toppings come together in minutes.
- Sweet and chewy texture: Every bite combines buttery crumbs, chocolate, and coconut.
- Perfect for sharing: Cut the cooled bars into squares for parties and cookie exchanges.
- Easy to customize: You can change the chocolate or add your favorite toppings while keeping the recipe simple.
Ingredients
- 2 cups graham cracker crumbs
- 1/2 cup unsalted butter, melted
- 1 1/2 cups semisweet chocolate chips
- 1 can (14 ounces) sweetened condensed milk
Optional addition: If you want a more traditional Hello Dolly flavor, sprinkle 1 cup of shredded coconut over the chocolate chips. This makes the recipe five ingredients, but adds the familiar chewy coconut layer.
Instructions
Step 1: Prepare the Baking Pan
Preheat your oven to 350°F (175°C). Lightly grease a 9-by-13-inch baking pan or line it with parchment paper, leaving a little overhang to help lift out the bars later.
Step 2: Make the Graham Cracker Crust
Place the graham cracker crumbs in a bowl and pour in the melted butter. Stir until the crumbs are evenly moistened.
Transfer the mixture to the prepared pan. Press it firmly into an even layer using the bottom of a measuring cup or a flat spatula. A well-packed crust will hold together better after baking.
Step 3: Add the Chocolate Chips
Sprinkle the chocolate chips evenly over the graham cracker crust. Spread them toward the edges so that every bar has plenty of chocolate.
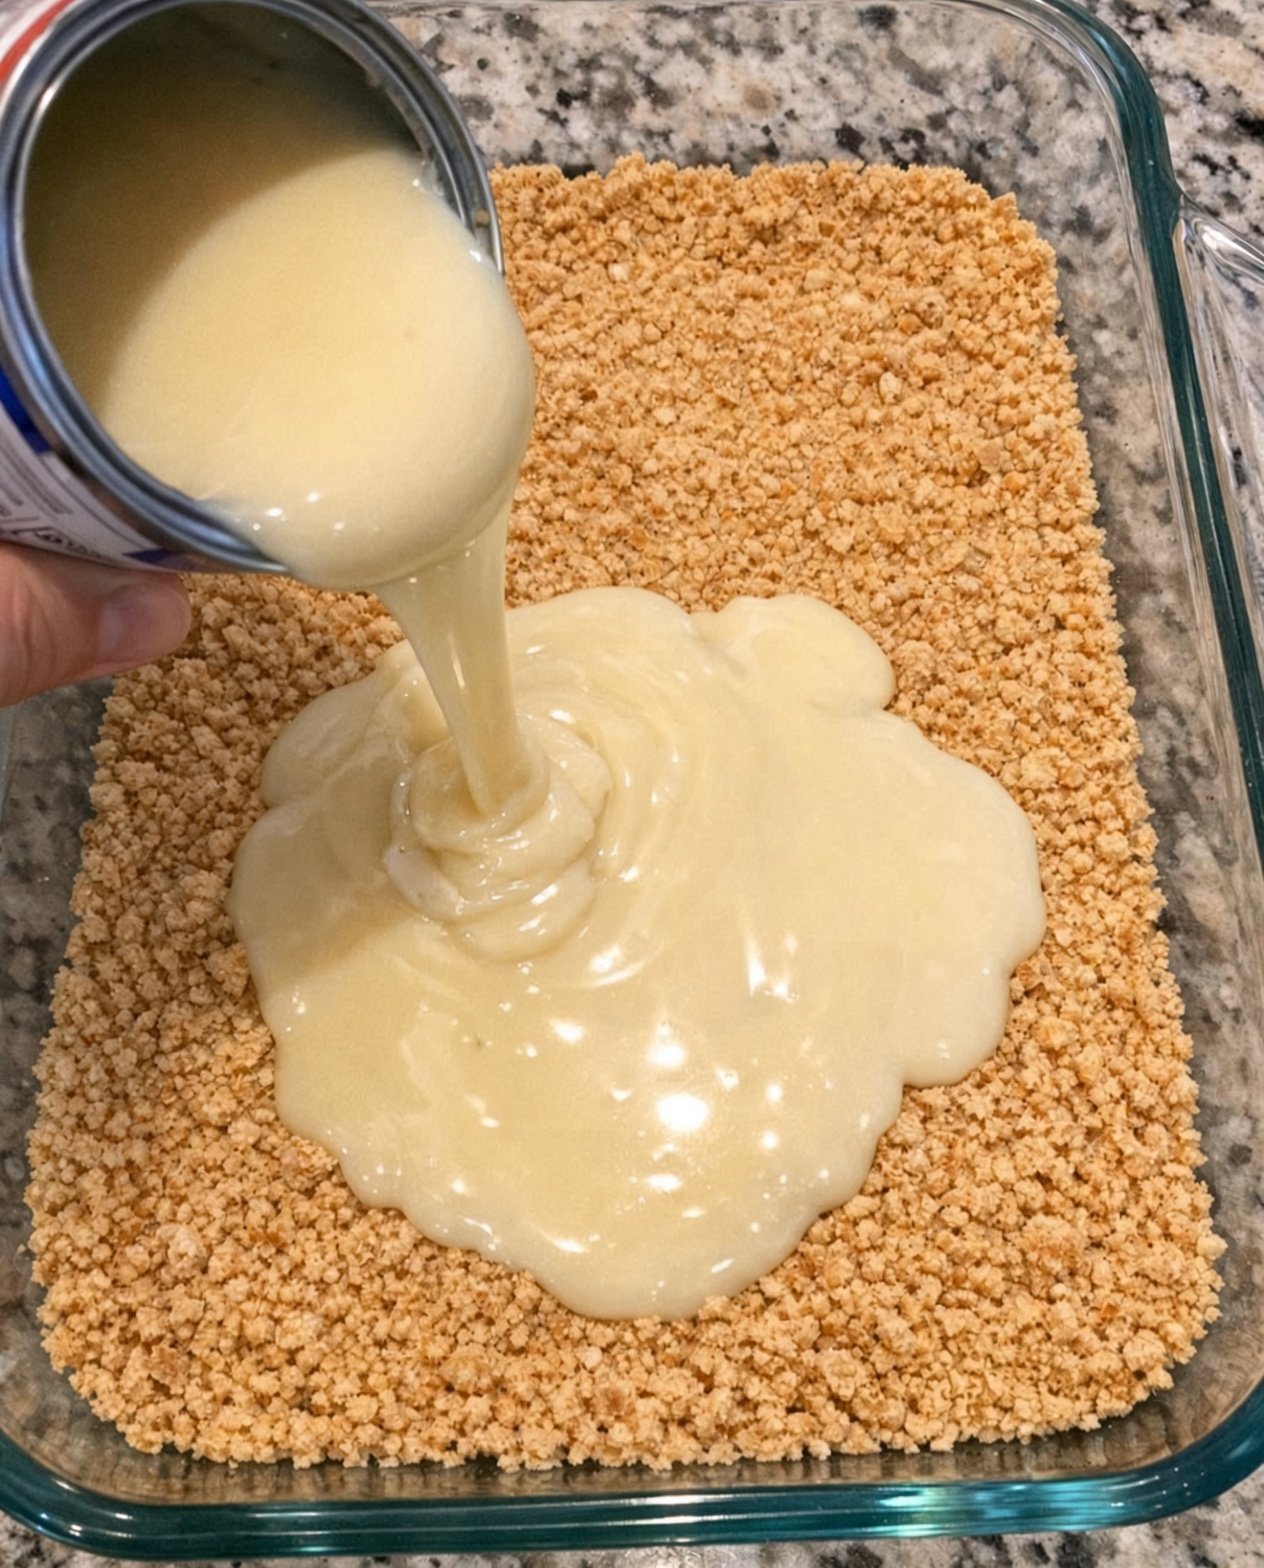
Step 4: Pour Over the Condensed Milk
Slowly pour the sweetened condensed milk over the chocolate chips, distributing it as evenly as possible.
Use a spoon or spatula to guide the milk into any uncovered areas. Avoid stirring the layers together; keeping them layered gives the bars their classic texture.
Step 5: Bake
Bake for 25–30 minutes, or until the edges are golden brown and the condensed milk is bubbling gently.
The center may still look soft when the pan comes out of the oven. It will firm up as the bars cool.
Step 6: Cool and Slice
Allow the bars to cool completely in the pan, about 1–2 hours. For cleaner slices, refrigerate the cooled pan for another 30–45 minutes.
Lift the bars out using the parchment paper, then cut into squares with a sharp knife.
Tips for the Best Hello Dolly Bars
Press the crust firmly. A compact crust is less likely to crumble when the bars are sliced.
Distribute the condensed milk evenly. Pour slowly across the entire pan to help bind the chocolate layer and crust.
Do not overbake. The edges should turn golden, but the center should not become dry or overly dark.
Cool completely before cutting. These bars need time to set. Cutting them while warm can cause the layers to fall apart.
Use parchment paper. This makes removing the bars much easier and reduces the chance of damaging the crust.
Choose your favorite chocolate. Semisweet chocolate balances the sweetness of the condensed milk, while milk chocolate creates a sweeter result.
Variations
Coconut Hello Dolly Bars
For the classic flavor, add 1 cup of sweetened or unsweetened shredded coconut over the chocolate chips before pouring on the condensed milk. This creates a chewy coconut layer.
Peanut Butter Chocolate Bars
Replace half the chocolate chips with peanut butter chips for a rich, nutty variation.
Dark Chocolate Hello Dolly Bars
Use dark chocolate chips for a less sweet, more intense chocolate flavor.
Nutty Magic Bars
Sprinkle 1/2–1 cup of chopped pecans or walnuts over the chocolate chips. The nuts add a pleasant crunch and complement the buttery crust.
Salted Chocolate Bars
After baking, add a very light sprinkle of flaky salt. The contrast between sweet condensed milk and salt makes the chocolate flavor stand out.
What to Serve with Hello Dolly Bars
These bars are delicious on their own, but they also pair well with:
- Hot coffee or espresso
- Black tea
- Cold milk
- Vanilla ice cream
- Fresh strawberries or raspberries
For parties, cut the bars into small squares and arrange them on a dessert platter with brownies, cookies, and other bite-sized sweets.
Storage Instructions
At room temperature: Store fully cooled bars in an airtight container for up to 3 days in a cool environment.
In the refrigerator: Keep the bars in an airtight container for up to 1 week. Chilling helps them hold their shape and makes them easier to slice.
In the freezer: Place the cooled, sliced bars in a freezer-safe container with parchment between the layers. Freeze for up to 3 months. Thaw in the refrigerator or at room temperature before serving.
Avoid leaving the bars in a hot environment for extended periods, as the chocolate can soften and the condensed milk layer can become sticky.
Frequently Asked Questions
Why are they called Hello Dolly Bars?
Hello Dolly Bars became popular in American home baking during the 1960s. They are often associated with the musical Hello, Dolly! and are also widely known as magic cookie bars.
Are Hello Dolly Bars the same as seven-layer bars?
They are closely related. Traditional seven-layer bars often include graham cracker crumbs, butter, chocolate chips, butterscotch chips, coconut, nuts, and sweetened condensed milk. This recipe is a simplified four-ingredient version.
Can I make these bars without coconut?
Yes. This four-ingredient recipe does not require coconut. The bars will still have a buttery crust, a rich chocolate layer, and a sweet, chewy center.
Why are my bars falling apart?
The bars may have been sliced before they cooled completely, or the crust may not have been pressed firmly enough. Let them cool fully and chill them before slicing for the best results.
Can I use a different type of crumb?
Yes. Finely crushed digestive biscuits or vanilla wafer cookies can replace graham cracker crumbs. The flavor and sweetness will vary slightly.
How do I know when the bars are done?
Look for golden edges and gentle bubbling around the sides. The center should look set around the edges but may still be soft. It will firm as it cools.
Recipe Card
4-Ingredient Hello Dolly Bars
Prep time: 10 minutes
Bake time: 25–30 minutes
Cooling time: 1–2 hours
Total time: Approximately 1 hour 40 minutes
Yield: 24 small bars
Ingredients
- 2 cups graham cracker crumbs
- 1/2 cup unsalted butter, melted
- 1 1/2 cups semisweet chocolate chips
- 1 can (14 ounces) sweetened condensed milk
Directions
- Preheat the oven to 350°F (175°C). Grease or line a 9-by-13-inch pan.
- Mix the graham cracker crumbs with the melted butter.
- Press the crumb mixture firmly into the bottom of the pan.
- Sprinkle the chocolate chips evenly over the crust.
- Pour the sweetened condensed milk evenly over the top.
- Bake for 25–30 minutes, until the edges are golden and bubbling.
- Cool completely before slicing into bars.
Final Thoughts
These 4-Ingredient Hello Dolly Bars prove that a simple dessert can still feel special. With a buttery graham cracker crust, plenty of chocolate, and a sweet condensed milk layer, they deliver the classic magic-bar experience with minimal effort.
Make a batch for your next gathering, tuck a few into a lunchbox, or keep them ready for an afternoon treat. Once you see how easy they are to prepare, they may become one of your favorite go-to dessert recipes.