Water pie is one of those fascinating recipes that seems almost too simple to be true. With just a handful of humble ingredients—water, sugar, flour, and butter—this pie transforms into a creamy, custard-like dessert that tastes like magic. Born out of necessity during the Great Depression, when fresh milk and eggs were scarce, water pie became a beloved way to create something sweet and comforting from almost nothing.
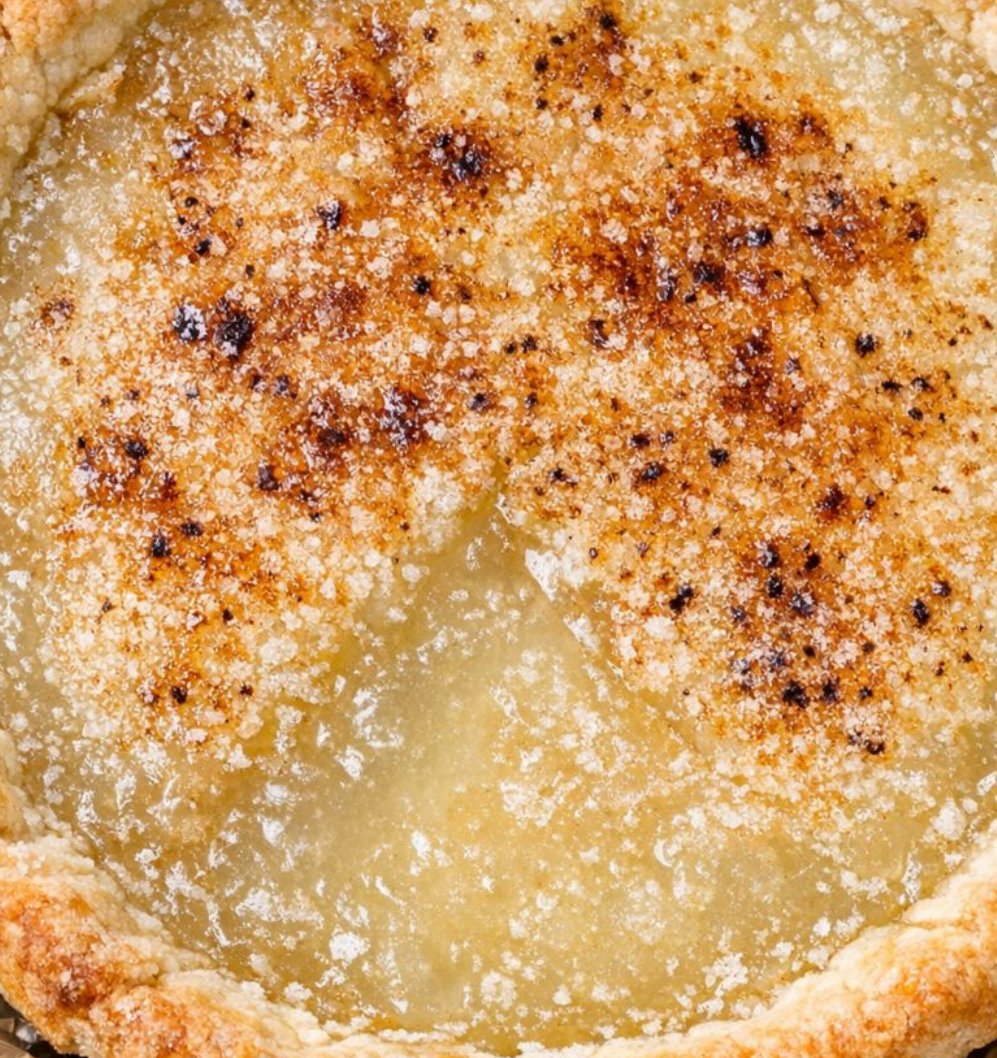
The result is a pie with a translucent, jelly-like center, a lightly caramelized top, and a flaky, buttery crust. It is proof that even in lean times, resourceful home cooks found ways to bring sweetness to the table. Today, this pie is a nostalgic reminder of simpler times and a surprisingly delicious dessert that deserves a place in any baker’s repertoire.
Why You Will Love This Recipe
-
Just 4 Ingredients: Water, sugar, flour, and butter—simple pantry staples.
-
No Eggs or Dairy: A unique custard-like pie made without milk or eggs.
-
Fascinating History: A classic Great Depression-era recipe that tastes like magic.
-
Surprisingly Delicious: The filling sets into a creamy, translucent, buttery jelly.
-
Easy to Make: Simple steps with ingredients you already have.
-
Nostalgic Charm: A conversation-starting dessert that will delight guests.
4-Ingredient Water Pie
Prep Time: 10 minutes | Bake Time: 50 to 55 minutes | Total Time: 1 hour
Servings: 8
This Depression-era pie uses just water, sugar, flour, and butter to create a creamy, custard-like dessert with a caramelized top and flaky crust.
Ingredients
-
1 unbaked 9-inch pie crust (store-bought or homemade, chilled in pan)
-
2 cups hot tap water
-
1 cup granulated sugar
-
¼ cup all-purpose flour
-
5 tablespoons unsalted butter, cut into small pieces
Instructions
Step 1: Preheat and Prepare
Preheat your oven to 400°F (200°C). Place the unbaked 9-inch pie crust on a baking sheet lined with foil to catch any drips and to make it easy to move in and out of the oven.
Step 2: Make the Filling
In a medium bowl or large measuring cup, whisk together the hot water, granulated sugar, and all-purpose flour until the mixture is mostly smooth. A few small flour bits are okay; they will bake out.
Step 3: Fill the Crust
Carefully pour the water mixture into the unbaked pie crust. It will look very thin and almost wrong—that is exactly how it is supposed to look at this stage.
Step 4: Add the Butter
Dot the top of the liquid filling evenly with the pieces of unsalted butter. As it bakes, the butter will melt and rise, helping create that translucent, jelly-like center and toasted sugar top.
Step 5: Bake
Place the baking sheet with the pie on the center rack of the oven. Bake at 400°F (200°C) for 25 minutes, then, without opening the oven, reduce the temperature to 350°F (175°C) and continue baking for 25 to 30 more minutes.
Step 6: Check for Doneness
The pie is done when the crust is golden and flaky, the top looks lightly toasted with patches of caramelized sugar, and the center jiggles like firm jelly when you gently nudge the pan. If the edges brown too quickly, loosely tent them with foil during the last 10 to 15 minutes.
Step 7: Cool
Remove the pie from the oven and let it cool completely on a wire rack. The filling will continue to set as it cools, going from very wobbly to a sliceable, translucent, buttery jelly texture.
Step 8: Serve
Once cooled, slice with a sharp knife, wiping the blade between cuts for neat slices. Store leftovers covered at room temperature.
Tips for the Perfect Water Pie
-
Use Hot Tap Water: Hot water helps dissolve the sugar and flour more effectively than cold water.
-
Chill the Pie Crust: A chilled crust helps prevent shrinkage and ensures a flaky, golden bottom.
-
Bake on a Baking Sheet: Placing the pie on a baking sheet catches any potential drips and makes it easier to handle.
-
Do Not Overbake: The center should be set but still have a gentle jiggle. Overbaking can make the filling tough.
-
Cool Completely: The filling continues to set as it cools. Slicing too soon will result in a runny pie.
-
Store at Room Temperature: This pie is best stored covered at room temperature for up to 2 days.
The History of Water Pie
Water pie originated during the Great Depression (1929–1939), a time when many families had limited access to fresh milk, eggs, and butter. Resourceful home cooks created this pie using the few ingredients they had—water, sugar, flour, and a small amount of butter. The result was a surprisingly creamy, custard-like dessert that provided comfort and sweetness during difficult times.
The pie gained renewed popularity in recent years through social media, where bakers rediscovered this vintage recipe and marveled at its ability to transform simple pantry staples into something magical.
Why This Recipe Works
The science behind water pie is fascinating. As the pie bakes, the butter melts and rises to the top, creating a lightly caramelized, toasted layer. The sugar and flour thicken the water into a translucent, jelly-like custard, while the crust becomes golden and flaky.
The result is a pie that is greater than the sum of its parts—a testament to the ingenuity of home cooks who found ways to create sweetness from almost nothing.
Variations and Additions
-
Vanilla Water Pie: Add 1 teaspoon of vanilla extract to the water mixture.
-
Cinnamon Water Pie: Add ½ teaspoon of ground cinnamon to the sugar mixture.
-
Lemon Water Pie: Add 1 tablespoon of lemon zest and 1 tablespoon of lemon juice.
-
Nutmeg: Sprinkle freshly grated nutmeg over the top before baking.
-
Coconut: Sprinkle shredded coconut over the butter before baking.
-
Gluten-Free: Use a gluten-free pie crust.
What to Serve with Water Pie
This simple, nostalgic pie is delicious on its own or paired with:
-
Whipped Cream: A dollop adds lightness and richness.
-
Fresh Berries: Raspberries, strawberries, or blueberries add color and tartness.
-
Powdered Sugar: A light dusting adds an elegant finish.
-
Coffee or Tea: The perfect accompaniment.
Storage and Make-Ahead
-
Room Temperature: Store the pie covered at room temperature for up to 2 days.
-
Refrigerator: Store in the refrigerator for up to 5 days. Bring to room temperature before serving.
-
Freezer: This pie does not freeze well, as the texture of the filling can become watery upon thawing.
Nutritional Information
Please note that values are estimates and will vary based on specific ingredients and portion sizes.
Per serving (based on 8 servings):
| Nutrient | Amount |
|---|---|
| Calories | 280–320 |
| Protein | 2–3g |
| Carbohydrates | 38–42g |
| Fat | 12–14g |
| Saturated Fat | 6–8g |
| Fiber | 1g |
| Sugar | 25–28g |
Conclusion
4-Ingredient Water Pie is a beautiful reminder that delicious desserts do not require a long list of expensive ingredients. Born out of necessity during the Great Depression, this humble pie has stood the test of time, delighting modern bakers with its simple magic. With its translucent, custard-like filling and flaky crust, it is a dessert that tastes like history and comfort in every bite.
I hope this recipe brings a little nostalgia to your table. If you give it a try, please leave a comment below. I would love to hear how it turned out for you.